We decided it was well past time to get a handle on the Broiler side of our operation. Our various brooder setups through the last few years have never been any good.
This year seemed like a splendid time to get away from the ad-hoc brooding and get our hoop house really set up properly. I attended a good pastured poultry seminar in Northfield this past winter and that got me motivated to get all the numbers dialed in on our hoop house.
I decided that we need to get a standardized batch size and figure out all the numbers from there. I figured that a batch of 300 or so chickens will fill up our stock trailer nicely, add a generous 10% for mortality and you’ve got 330.
330 chicks * 0.5 square feet per chick (1-6 weeks old) = 165 square feet.
That looks awfully close to 1/3rd of our hoop house, each third of which measures 12’x14′ or 168 square feet.
Conveniently, the other 2/3rds is pretty close to the 1.1 square foot/bird requirement for the second half of a broilers lifespan.
Fortunately the hoop house is pretty easy to divide up, the walls are, after all, a simple sheet of plastic.

The brooder part of the hoop house needs to be kept at a very warm, very stable temperature for the first few weeks of the chicks life, (80-90F). For the temps we have to be prepared for in Minnesota, we have completely abandoned electric brooders.

We now use a propane brooder, which married to a 100# LP tank, can keep chicks toasty warm for a week before the tank needs a refill. Two refills per batch of chicks, as the chicks won’t likely need supplemental heat after week two unless the weather gets really ugly.
In an effort to concentrate the heat a bit, we made a “tent” over the brooder with a bit of extra greenhouse film.
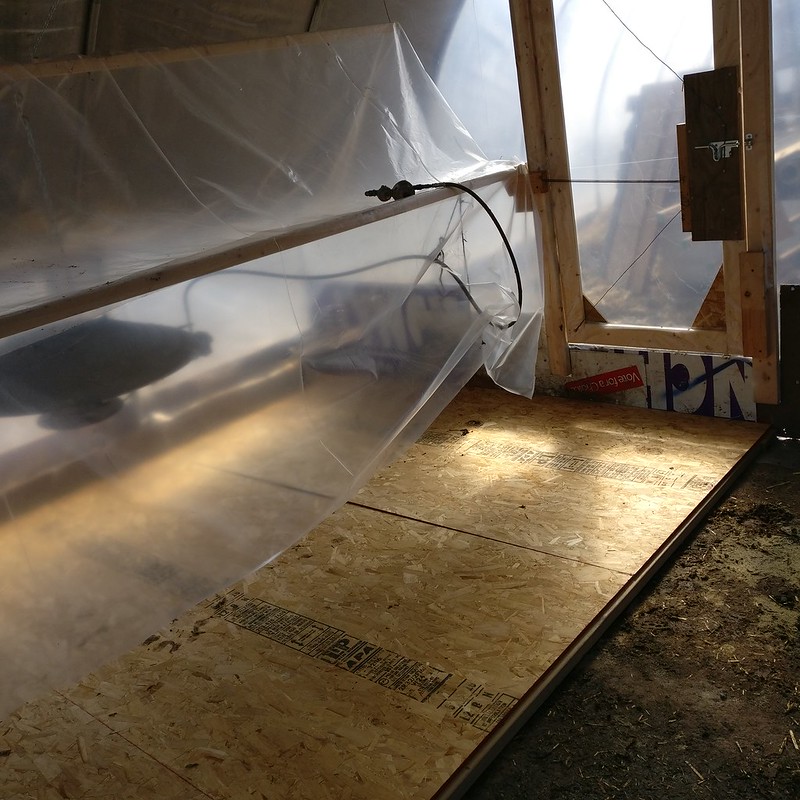
I know from experience that our hoop house has some really fun water infiltration issues when it rains. This is a serious problem when raising chicks as there’s nothing that will chill a chick faster than getting wet. To ensure that the chicks will stay dry, we built a false floor under the brooder with a few spare sheets of OSB and 2×4’s.
We got some hemp bedding to use in the brooder, and I’m in love with the stuff. It’s insanely absorbent and a lot more friable than pine shavings. It also has a smaller, more consistent particle size that the chicks can more easily keep mixed up through their scratching.
According to the numbers, our 330 chicks need 4 of the 48″ feeders, and we’ve given them 20 nipples to drink from.
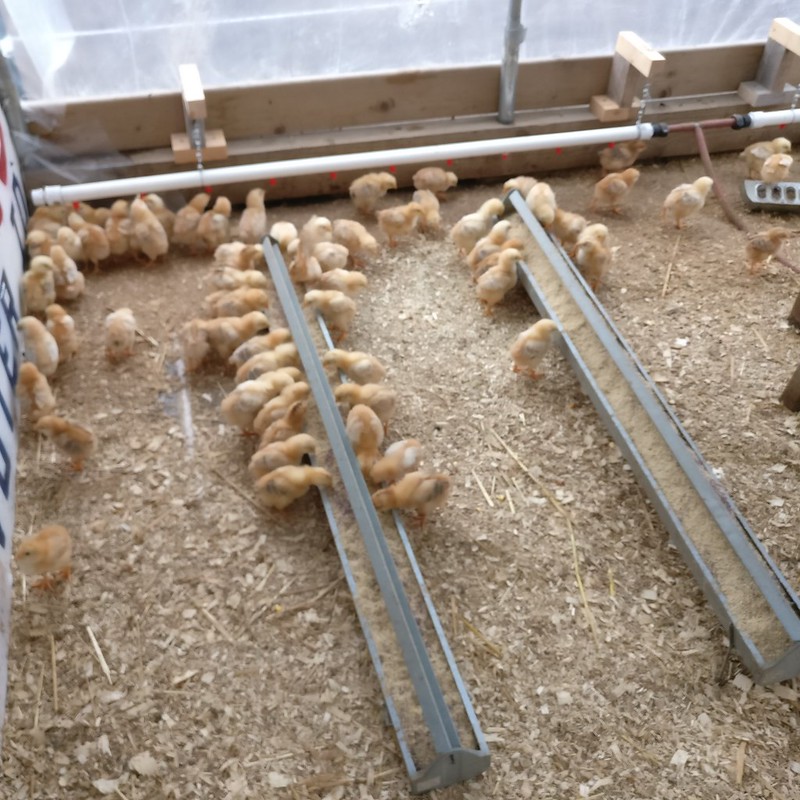
I discovered in the pastured poultry seminar that I’d been seriously overlooking the water situation for our chicks, so we have a dedicated 50 gallon reservoir for the brooder which makes it possible to get the chicks started on electrolytes as soon as they arrive. We can also more easily dose them with Apple Cider Vinegar or probiotics as needed, apparently it’s a whole thing.
The last bit we did for the brooder side of things is to address the ventilation issue.
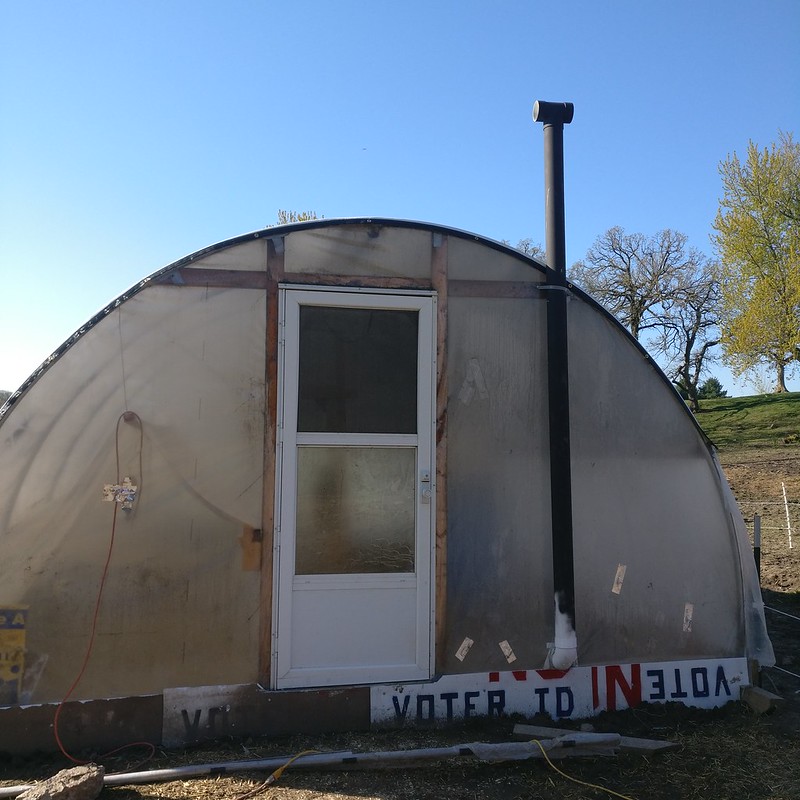
Sure, it needs to be buttoned up pretty tight to keep warm, but air circulation is still neccessary, so we added this lovely thermal vent stack to the end of the hoop house. It doesn’t get much simpler than this, but it still has a pretty good draw through it 24/7.
Anyway, over on the other 2/3rds of the hoop house is the second (grower) stage.
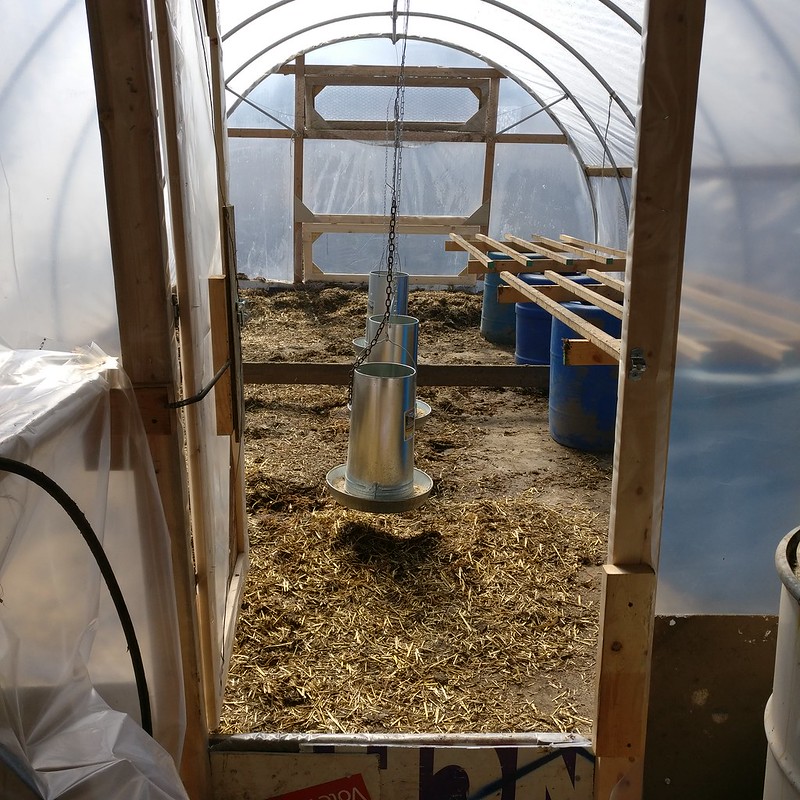
Once the chicks have reached 4 weeks of age, AKA: old enough to withstand sub-freezing temperatures (kind of a big milestone here during a Minnesota spring), they’re moved out of the brooder and into the grower stage. The grower stage is a lot less demanding (at least climate-control-wise) so it’s just a matter of hanging the appropriate number of feeders, providing a few places to roost, and getting plenty of water.
Again, water is fairly important, so plenty of water looks like a 275 gallon reservoir and 20 nipples.
I put a nice big door on the end. During the day we’ll open it up and let the chickens go free-ranging around. This part is very dependent on the breed. If you did this with Cornish cross then don’t expect them to actually go free-ranging very much. When we decided to switch over to the red ranger broilers we did so because they can really be relied upon to go out and hustle up the green portion of their diet all by themselves.
I’m not a big fan of carting around a bunch of couch-potato chickens every day in an effort to force them to eat their veggies. The red rangers get it done of their own volition.
To finish the whole thing off, we got a tarp to cover the hoop house. The greenhouse film made it entirely too warm in the hoop house when it was sunny, so we threw a big tarp over the whole works. Temps are reasonable, two layers are all insulation-y and it’s still typically 5-10F above ambient in there most days.
I met you at Red Wing Farmers Market….I love your blogs and emails and photos.. I always learn something nw Thnx for all you do for the animals and the environment
Wow!!!! That is an amazing hoop house! I am so impressed with everything you did. I am in total agreement about apple cider vinegar and probiotics (I use keifer water) for my ladies. They are going on 5 years now and healthy as a pullet and still strong on laying eggs. (I have 3 Buff Orps). I am also able to let them free range now in our almost 1 acre yard. I started last year and had to “teach them the boundaries” for awhile first but by golly, they stay right where they are supposed to be now (and my neighbor’s tulip garden is very happy for that)!
Congrats on all the hard work! Can’t wait to hear how it does for the summer!